NBA, NHL Playoffs Are Here. Now Streaming On US Sports Radio!

- By Jackson Chlebowy
Ice Hockey is a fast-paced game that requires precision, teamwork, and quick decision-making. Plays can occur in a matter of seconds, requiring players to think strategically while successfully executing their skills. The dynamic and fast nature of the game makes mastering passing essential for both individual and team performance. Hockey passing drills are integral for developing accuracy, timing, and communication on the ice. Whether you're a beginner or an experienced player, incorporating these drills into your practice routine will elevate your game and strengthen team dynamics.
Why are Passing Drills Important?
Passing is more than moving the puck from player to player. It’s about creating scoring opportunities, controlling and maintaining puck possession, and keeping your opponents on their toes. Effective passing can be the difference between a good team, and a great one. At the beginner level, passing drills allow players to develop their accuracy and puck-handling skills. At the more experienced levels, Passing drills allow players to simulate in-game situations where they can learn, adapt, and react to different game scenarios. Hockey passing drills can improve:
- Puck Control: Learning to pass, and receive passes under pressure will enhance players' ability to control play and keep the puck moving. It will also train players to make smart decisions with the puck to maintain team possession and control play.
- Team Chemistry and Communication: Practicing passes, and passing scenarios will improve team communication and understanding on the ice. Through consistent practice and repetitions teammates will become better communicators on the ice, and learn each other's tendencies or preferences. This can help teams get on the same page, reducing the potential for costly turnovers and broken plays.
- Quick and Intelligent Decision-Making: Hockey is a game of time and space. Quick and accurate passes help your team play faster and more efficiently. Minimizing time spent in possession of the puck will allow your team to rapidly move the puck down the ice or away from danger, exploiting holes in the defense before they are able to adjust or react. This faster tempo can create dangerous scoring opportunities and odd-man-rush situations.

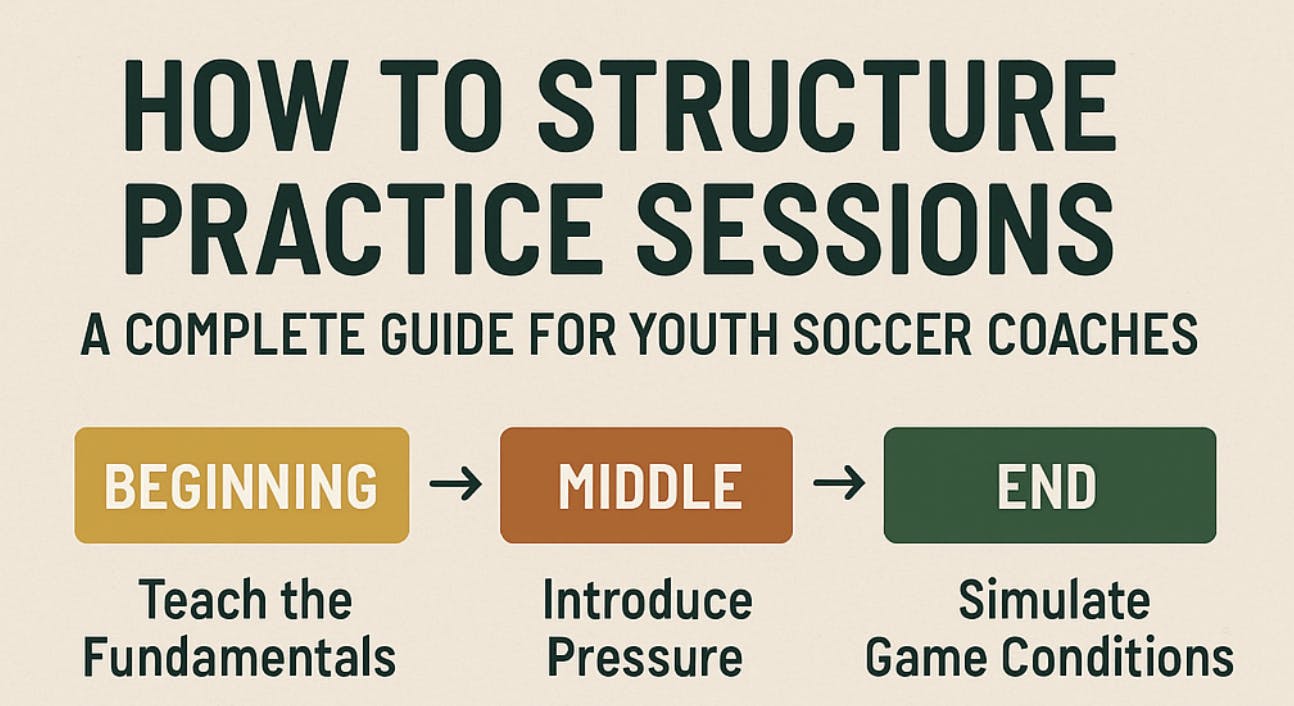
4 Hockey Passing Drills to Improve Team Performance: Mites to Peewees
Here are four passing drills, starting with the basics, that will help your team dominate this upcoming hockey season.
Partner Passing
Partner passing is a simple and easy passing drill for building up the basics of giving and receiving a pass. Coach Patrick Burke, a former college hockey player and successful coach explains the fundamentals of passing in his ‘Coaching Youth Hockey: From Mites to PeeWees’ course. Coach Burke has a strong focus on player and skill development and has led championship-winning teams at the high school varsity level. He has years of coaching experience at nearly every level of the game, from mites to college.
Have each player choose a partner, and line them up 5ft-10ft from one another. Each pair will have 1 puck between them and will practice passing back in forth to one another, focusing on making crisp tape-to-tape passes with their forehand and backhand. Emphasize the importance of “soft hands”, in this drill when receiving and passing the puck.
Passes should be made with a sweeping motion, not a slap. When receiving the pass players should cradle the puck, catching it like a slingshot. This will give the player more control, and allow them to load up for a quick pass back. Make sure players have their heads up when passing and receiving; Looking at their target, not the puck. Once players are comfortable at 5ft-10ft, have them move further and further away.
The Box Drill
This is another important drill from Coach Patrick Burke (Click above). In Coach Burkes ‘Coaching Youth Hockey: From Mites to PeeWees’, he explains the importance of following, not watching your passes.
The Drill is simple. Place 4-6 players in a box or along a faceoff circle. The players will pass the puck to one another, following their pass each time and remaining ready for an incoming pass. This gets players out of the habit of watching their passes and taking themselves out of the play. Young players must understand the importance of moving their feet after passing. Rarely in hockey are plays made while stationary. Getting in the habit of moving their feet, and being ready to receive a pass at any time will allow them to support their teammates and beat their opponents to open space.
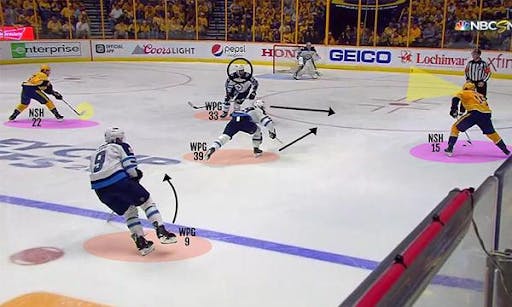
2 Player Slot Passing Drill
This is a more intermediate drill that can be used for most skill levels and age groups. The 2-player slot drill emphasizes the importance of timing (from both the passer and receiver) communication and, the ability to cleanly catch and release the puck on the net. Being able to find your teammates quickly, and release the puck effectively in dangerous areas of the ice will help create and convert on more scoring chances.
Start by splitting the team into 2 groups (they should alternate groups as the drill goes on), one group at the blue line on either side of the ice and the other group in the corner diagonally across. Set up 2 piles of pucks, one behind the net and the other in the empty corner. The drill will begin at the point with one puck (after this, the drill can continuously run without stopping and starting). Have this player skate into the slot and take a shot on net. After the shot, skate behind the net to pick up a puck. The player in the corner should begin skating around the top of the circle, timing it so that he reaches the apex of the circle as the player with the puck is ready to pass. He/she then receives the pass in the slot for a shot on the net. After the shot, he/she then skates to the far side corner with the 2nd pile of pucks to make a pass to the next player in line at the point. Restarting the drill over again with new players.
Players throughout the drill should communicate with each other, calling for passes and presenting themselves for scoring opportunities. Never during this drill should a pass be made to a stationary target, players should time their portion of the drill to receive the pass in, or around the slot area.
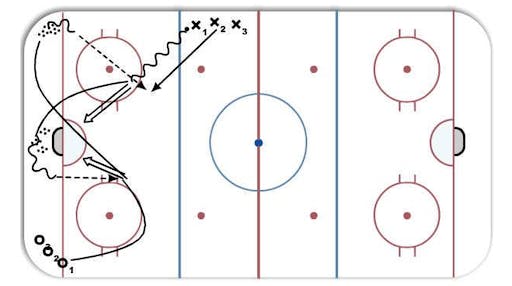
Breakout/Regroup Drill
The Breakout/Regroup drill is a more advanced drill used to simulate real game scenarios. This drill simulates the breakout/regroup and gives players the opportunity to practice quick decision-making and communication with their teammates. A swift and effective breakout is essential for starting the transition from defense to offense. A well-conducted breakout can alleviate pressure in the defensive zone and create odd-man opportunities going the other way. The regroup and transition game is all about finding open teammates and attacking the weak areas of the ice. Players should keep their heads up at all times, looking to exploit open ice with a pass, or with their feet. Being in the position to make a play is just as important as the pass.
Begin the drill with 2 defensemen on both blue lines (4 total), and a line of forwards at center ice. The coach should dump the puck into a corner for the defenseman to retrieve, beginning the breakout with a D-to-D pass. While this is occurring, the line of forwards enters the zone and swings for a breakout pass. It is important that the forwards time their swing, that way they don't leave the zone too early or force the defenseman to make a dangerous stretch pass that could be intercepted in game situations. They will exit the zone, and pass to the 2nd set of defensemen at the opposite blueline.
Forwards should cross, and swing presenting themselves for a regroup pass from their defenseman. They will then play 3 on 2 against the original defenseman. Forwards should use this opportunity to get creative and take advantage of the odd-man opportunity.

Everyone has a role to play in the National
#YouthSports Strategy! Learn more about the strategy and ways to get
involved from @HealthGov: https://bit.ly/2lQ85f6