Now Streaming On US Sports Radio!

US Sports Net Today!


Live Play-by-Play, Updates, Highlights and More! on US Sports Network!
[Chrome Users-You may have to click on the play button twice to listen]
US Sports Network Powered By Gorilla Sports!


US Sports Radio
The Las Vegas Raiders Play Here
Fitness and Sports Performance Info You Can Use!
The Scoreboard Mall
The Rock Almighty Shaker Of Heaven And Earth!
The Coolest Links In The Universe!

Saturday, April 19, 2025

US Sports Martial Arts: What Are Some Solo Muay Thai Drills? and ONE Friday Fights (Replay) 105: Kongsuk vs. Lamnamoonlek


ONE Championship  


  • By Owen Reilly

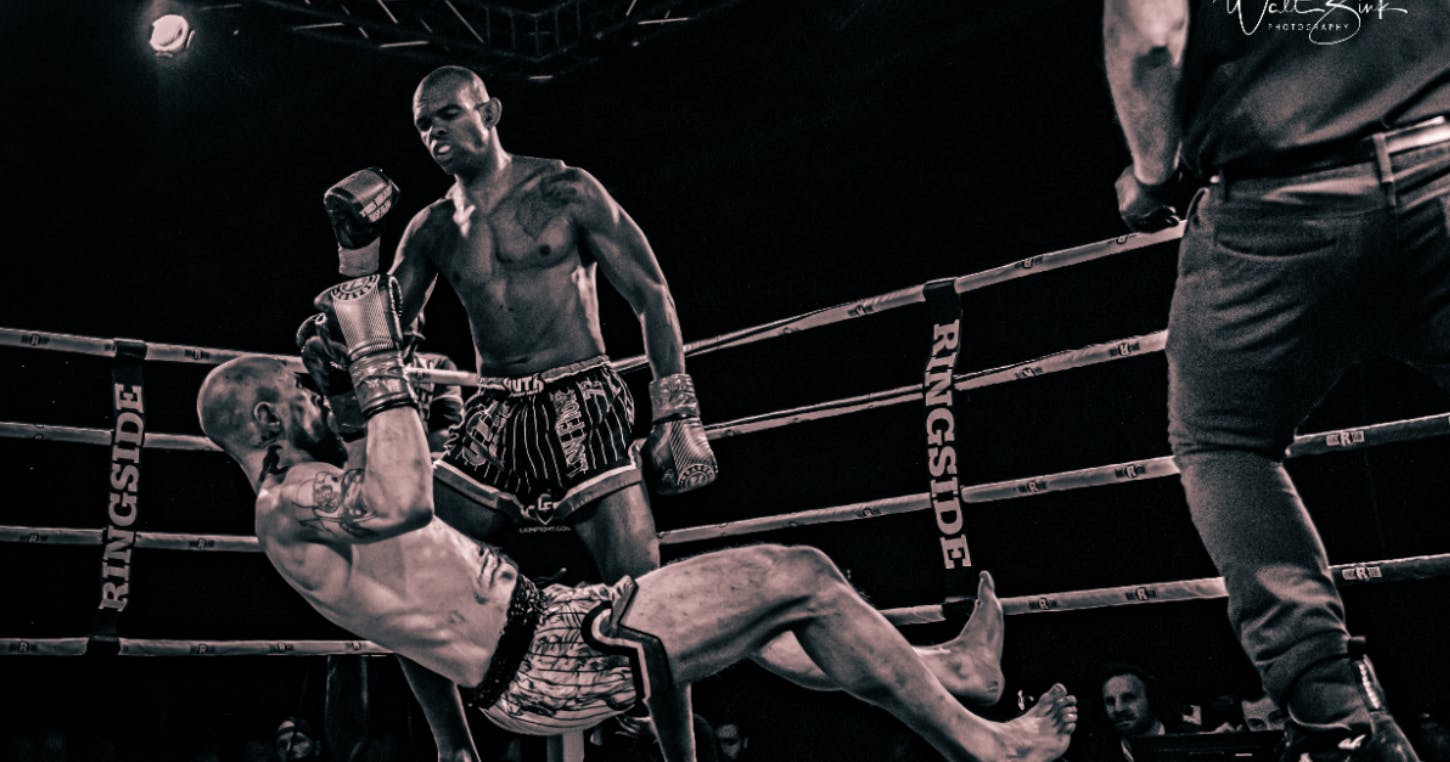
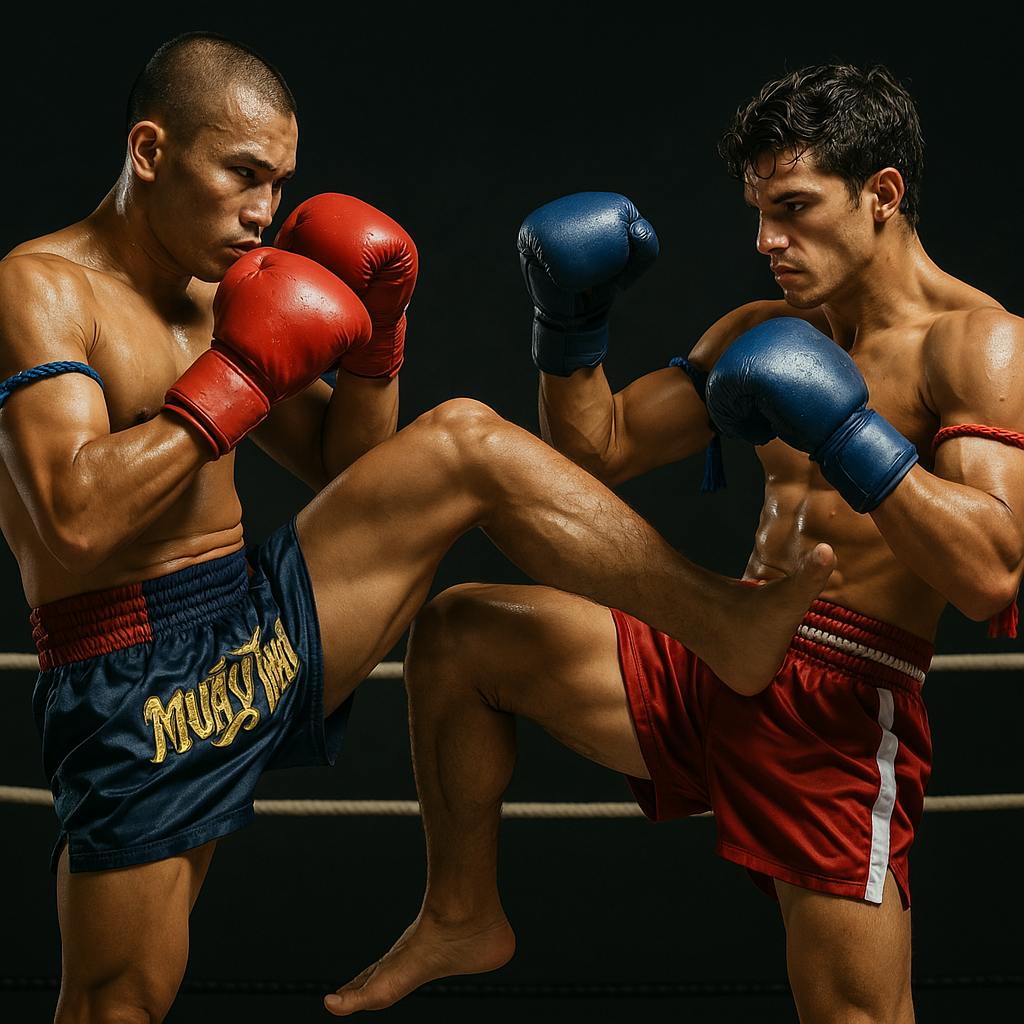
Muay Thai is a striking art that emphasizes elbows, knees, clinches, and sweeps. Although regular training sessions with a coach are necessary to hone your fighting ability, individual conditioning and technical drills at home can be the difference between winning and losing a fight. In this blog, we review five drills that can be done at home with minimal or no equipment.

Shadowboxing

Shadowboxing is an incredibly effective drill that can be utilized in some form for nearly every martial art. When utilizing this drill for Muay Thai, be sure to throw elbow and knee strikes along with practicing avoiding clinches as well as sweeps. Shadowboxing can also allow you to work on your head movement, parries, and other defensive movements. Completing three to five rounds with each round lasting three to five minutes provides you with ample time to work your endurance and technique. 

Heavy Bag Work

Although requiring a heavy bag, heavy bag work is a great way to improve power as well as endurance. To work on power, repeatedly throw combinations as hard as possible such as a jab-cross-hook-kick. For speed, attempt to throw combinations as fast as possible while keeping your technique. The heavy bag also allows you to work on accuracy. When throwing strikes such as a teep kick or a high kick, attempt to throw your strikes at the correlating point on someone's body. Lastly, the heavy bag is a great tool that can be used to work on endurance. Similar to shadowboxing, three to five rounds of three to five minutes of repeatedly striking the heavy bag without stopping can greatly increase one's endurance when fighting.

Footwork Drills

Footwork drills help to increase one's offensive and defensive capabilities. Understanding how to fight moving backward, forwards, or when angling off. Some at-home drills to work on footwork include the cone and tape drill, lateral movement drills, and the circle drills. The cone and tape drill includes setting up a T-shape on the ground with tape and placing cones at the ends of the T to mark the border of the drill. You should get in your stance standing in the T and throw various strikes using the tape to correct your footwork. Lateral movement drills are simple drills that see the athlete moving side to side in their stance while angling off. This drill is often utilized in tandem with shadowboxing. The circle drill includes moving circularly around an object. Doing so while throwing strikes allows you to learn how to effectively strike when moving circularly. Each of these drills, although simple and somewhat similar, improves footwork and your ability to fight while moving in various directions.

National Youth Sports Strategy

Everyone has a role to play in the National 
#YouthSports Strategy! Learn more about the strategy and ways to get 
involved from @HealthGov: https://bit.ly/2lQ85f6

Teep and Knee drills 

Knee and Teep drills help to improve not just the techniques, but also your balance and control. To perform this drill, continue to throw teep kicks or knees toward a wall without falling backward. Doing so also allows you to improve your understanding of range. When throwing, be sure to focus on keeping proper posture and hip extension. When completing this drill, throw fifty teep kicks and fifty knees with each leg to refine your technique and improve your endurance.

Strength and Conditioning Drills

Simple strength and conditioning drills can work wonders for your endurance. Simple bodyweight exercises including jump squats, push-ups, sit-ups with an elbow twist, and planks to explosive jumps can give you the strength and stamina necessary for competitions. Further exercises include burpees or interval sprints. Long runs also greatly increase one's cardio.

Each of these drills are able to improve some aspect of your muay thai skillset. All of these drills can be done with minimal or no equipment. For more drills and techniques, check out the course below.

null

Dr. Berg Electrolyte Powder Raspberry Lemon


Friday, April 18, 2025

US Sports Volleyball:The Evolution and Importance of Volleyball Nets in the Game and Lube vs. Perugia | SuperLega 2025 - Playoffs

 Victory News/Flashpoint. News You Can Use Now Streaming On US Sports Radio!


  • Author Elson Volley

Volleyball, a dynamic sport celebrated worldwide, owes much of its essence to the humble yet essential component: the volleyball net. Serving as the symbolic division between two competing teams, the volleyball net has undergone significant evolution since the sport's inception, becoming an integral part of its identity.

Historical Roots and Evolution

The origins of the volleyball net can be traced back to the late 19th century when William G. Morgan invented volleyball as an indoor alternative to basketball. Early iterations of the net were simplistic, consisting of basic materials such as rope or woven fabric. The need for standardised equipment, including the net, became apparent as the sport gained popularity and formalized rules emerged.

Over the decades, advancements in materials and technology have transformed volleyball nets into sophisticated apparatuses. Modern nets are typically constructed from high-strength materials like nylon, which offer durability and resistance to wear and tear. The introduction of adjustable net systems has also enhanced versatility, allowing for quick setup and precise adjustments to meet regulatory height standards.

Technical Specifications and Design

The dimensions and specifications of volleyball nets are meticulously defined to ensure uniformity and fairness across competitions. According to official regulations, the net must measure 32 feet (9.75 meters) in length and 39 inches (1 meter) in width, with a mesh size not exceeding 3.94 inches (10 cm). Additionally, the net's height is 7 feet 11 5/8 inches (2.43 meters) for men's competitions and 7 feet 4 1/8 inches (2.24 meters) for women's competitions.

Beyond these standard measurements, volleyball nets feature design elements to optimise performance and safety. Reinforced top and bottom bands provide structural integrity and prevent sagging. At the same time, side tapes enhance visibility and define the boundaries of the court. Some nets incorporate tensioning devices and centre markings to facilitate proper installation and alignment during setup.

Crucial Role in Gameplay

The volleyball net plays a multifaceted role in the game's dynamics, influencing strategy, tactics, and player interactions. As the primary obstacle between opposing teams, the net acts as a barrier players must navigate to execute offensive and defensive maneuvers effectively.

From a defensive standpoint, players strive to block and deflect incoming attacks at the net, disrupting the opponent's rhythm and thwarting scoring opportunities. Conversely, on offence, skilled setters utilise the net as a reference point to position the ball for powerful spikes and precise placements, exploiting gaps in the opposing team's defence.

Moreover, the net fosters a sense of anticipation and excitement, heightening the intensity of rallies as players strive to outmaneuver their opponents. The dramatic spectacle of players diving and leaping over the net in pursuit of the ball exemplifies the athleticism and competitiveness inherent in volleyball.

Conclusion

In essence, the volleyball net embodies the spirit of competition and camaraderie that defines the sport of volleyball. From its humble origins to its modern incarnation, the net has remained a steadfast symbol of unity and division on the court. As volleyball continues to captivate audiences worldwide, the significance of the net as a fundamental element of the game remains unwavering, transcending generations and cultures alike.

Elson Volley is the best place to buy volleyball sets and equipment

Website: https://www.elson.com.au/volleynets/

Thursday, April 17, 2025

US Sports Softball: Three Competition-Based Hitting Drills For Your Softball Team and #12 South Carolina vs #19 Clemson (Great Game!) | 2025 College Softball Highlights

 Play Ball! Now Streaming On US Sports Radio

  • By Grant Young

Finding ways to simulate a competitive environment during a softball practice can be a tricky matter. 

All coaches know that hitters (and any other athlete) perform better under pressure if they’re used to doing so. And giving players this experience is a great way to boost their confidence when game day arrives and they find themselves squaring off against the opposing team’s top pitcher.

But with daily practices being such a low-stakes, low-intensity endeavor, coaches often need to get creative if they’re to get their hitters to engage and prepare to compete once their at-bats begin to matter. 

While this can be a daunting task for coaches, considering how hectic their schedules and practice routines surely already are, letting a softball coaching legend like Brittany Scarafiotti lay out the blueprint for making practice drills competitive is the perfect solution. 

Coach Scarafiotti (who used to go by Coach Lee) has been a head softball coach at various high schools in Texas since 2018. In 2023, Coach Scarafiotti’s Keller ISD high school softball team was 6A Regional Quarterfinalists and produced the first Playoff wins in school history. Prior to the beginning of her successful coaching career, Coach Scarafiotti was a former DI collegiate softball student-athlete for Stephen F. Austin State University, graduating with a bachelor’s degree in 2014. 

Coach Scarafiotti knows that running competitive hitting drills helps build her players’ confidence at the plate, and has been a major catalyst for their success. And this has not only helped her high school teams win games, but getting her players used to competing at practice has given those who’ve ascended to the collegiate level a leg up on their peers, as well. Her ‘Competitive Drills and Pressure Practice’ course will provide you with all the info you need to turn your practices into a space for cultivating competitive excellence. 

Target Practice

One unconventional method that Coach Scarafiotti utilizes with her high school softball hitters is hitting Fungos often. 

“Any time an athlete can hit Fungo, I’m a big component of it,” Coach Scarafiotti said. “It’s teaching them to see where they toss the ball, good barrel control, still working good hitting mechanics. It’s just on a smaller scale.” 

One fungo-based drill that Coach Scarafiotti utilizes is what she calls the target practice drill. It starts with a player who’s holding a Fungo and three softballs standing along the first base line a few feet away from home plate while the fielder is standing near third base. 

After you successfully complete the Certification, you can have various opportunities in your professional growth. You can be:  Blockchain Developer Blockchain Architect Blockchain Consultant Smart Contract Developer

The player with the Fungo will then hit a ground ball to the fielder, who will attempt to field it cleanly and throw it back to a net that the hitter is standing in front of. That process will then repeat with the rest of the softballs before the two players switch places. 

This target drill can become competitive if there are multiple different teams (i.e., partners) taking part in the drill. In this case, the entire thing can be timed, and the team that gets the quickest time while fielding every ball and hitting every fungo cleanly is the winner. 

Another important part of making practice drills competitive and engaging is having a reward for the team that wins. Often it can be the team that wins gets to skip conditioning or doesn’t have to shag balls at the end of practice, but coaches can get creative with whatever reward best suits them.

Beat the Runner

Another one of Coach Scarafiotti’s favorite drills with her team is what she calls the “Beat the Runner” drill. 

For this drill, you will need to have players at every single position in the field and another team ready to hit. From there, you’ll have one hitter on a tee at home plate hit the ball. Regardless of where they hit it or whether it’s fielded, that player is going to run around all the bases. 

The fielders will field the ball; and if it’s hit in the infield they’ll throw it to first base, home, third base, second base, first base, and home in hopes of doing so before the runner reaches home. And if the ball is hit in the outfield then the initial throw will go to home, then third base, second base, first base, then back to home. 

In other words, the goal is to throw the ball around the horn before the hitter gets back to home plate. 

Ideally, you’ll have enough players to field two full teams and bat around the lineup, then tally which team has the most points (the fielding team gets a point if they get it around the horn in time, hitting team gets a point if they make it to home). 

But if you don’t have enough players then come up with some other creative way to tally and determine a winner and loser. 

Your Count or Way Ahead

null

A third drill that Coach Scarafiotti uses to simulate high-pressure situations is the ‘Your Count or Way Ahead’ drill. 

This is a practice with live at-bats between pitchers and hitters. When it’s a ‘Your Count’ day, that means every at-bat begins as if the count is 2-0. Therefore, pitchers need to throw a strike and batters are looking for something to hit.

And if it’s a ‘Way Ahead’ day, that means every at-bat begins as if the count is 0-2. That means the hitters must stay alive while the pitchers are trying to get a strikeout. 

The point of both versions of this drill is that either the pitcher or hitter will be confronted with what’s likely a losing situation. This will get them more comfortable when facing these situations in the actual game.


NYSS Find Their Strengths 
Sports help kids build confidence and grow into 
healthy, active adults. Learn how organizations, communities, and 
policymakers can use @HealthGov’s National #YouthSports Strategy to 
support youth sports: https://bit.ly/2lQ85f6

Wednesday, April 16, 2025

US Sports Golf: Three Ways to Make More Difficult Putts and Random Club Challenge Alexa Pano vs. Nataliya Guseva

 Bombs Away In The Bronx! Now Streaming On US Sports Radio!


Putting in golf can be incredibly frustrating. The delicate nature of judging the green, coupled with the pressure to execute a flawless stroke, often leads to intense frustration when putts don't go as planned. Even the smallest mishaps in alignment or speed can result in a missed putt, making it a source of frustration for golfers at all levels.

Putting is difficult for several reasons. Firstly, reading the greens accurately to determine the break and speed of the putt is a highly challenging task. Additionally, maintaining a smooth and consistent putting stroke, especially under pressure, is crucial for success. The smallest error in alignment or pace can result in the ball missing the hole, making it a mentally and physically demanding aspect of the game. And because putting can seem so hopeless for even the most seasoned golfers, the failure to perform on the putting green can ruin an otherwise great day at the course. 

There are plenty of putting lessons online where you can glean some solid tips on how to improve various aspects of your game. But there is only one Geoff Mangum. 

Coach Geoff Mangum has spent over 25 years researching and studying everything there is to know about putting. He is recognized as the world's top expert in how the brain and vision work when targeting and making movements in putting. His unique approach combines traditional knowledge with modern science. 

Mangum is one of the top putting coaches in the world and has a very successful website called puttingzone.com, where Mangum has been investigating the science of how the brain and body operate to perform the “skills” of putting for the first (and still the only time) in golf history, revolutionizing the game that has long only taught ad hoc tips and drills mostly for stroke alone, but without teaching how perceptions form and guide movements and how “brains do ‘physics’  predicting and executing reading, aiming, stroke, and touch”.

Coach Mangum’s ‘Reading Greens and Making Putts’ course discloses many tips that only someone who has dedicated their life to putting can glean. Regardless of where on your golf journey you are right now, the following bits of advice from Coach Mangum are guaranteed to improve your game on the green. 

Lag Putting

Knowing how to execute a proper lag putt on the green can make a major difference on a scorecard. For anyone who doesn’t know, A lag putt in golf is a long putt that a golfer attempts to get close to the cup but doesn't expect to make. The goal is to get the ball within a 3-foot circle around the cup when making the putt. 

Coach Mangum has a rule of thumb to improve a golfer’s lag putts. He recommends that the distance should always be to the fall line on the high side of the hole, which should make for a relatively accurate target to aim for when making the lag putt. 


Beyond Retro

For the rule of thumb, Coach Mangum first wants golfers to imagine the general average slope grade of the section of the green you’re putting on, which will get you some general percentage (for a rather steep green, it would be about 4%). 

Then you will want to count the number of military paces there is between where you ball in and the hole. Finally, you will want to multiply that number by the percentage you took earlier and will use that answer to find out how many inches you want to aim up the fall line from the center of the hole. 

While this is going to involve a lot of guesswork if you’re able to estimate nearly enough of all of these figures and execute the putt to that new target, Coach Mangum is convinced you’ll produce a putt you’re proud of. 

Difficult Putts

When it comes to having to make a difficult put on a steep surface, the first read you will want to make as it pertains to making the putt is the surface flatness of where the actual hole is located. Once you have a good idea of that, that will provide a solid baseline of where to angle a putt. 

After doing so, you will want to figure out where the green’s contour lines are. Contour lines show the green's topography and slope, which can help golfers determine their putting line because of how they indicate the slope’s severity. 

Essentially, you’ll be looking for a line where the steepness of the green changes. Once you do so, you’ll figure out that the fall line (an imaginary line that runs through the center of the cup and indicates the direction of a straight downhill putt) is going to be exactly perpendicular to that contour line. This will help you line up where you should be aiming your difficult putt.

Closing Comments

null

While there are numerous calculations and reads that Coach Mangum referenced that can be beneficial to improving your putting, his bottom line is that putting well is always going to come down to touch. 

What he means by this is that having a consistent delivery speed (the firmness with which you’re connecting your putter to the ball) when putting is what truly differentiates between good and great golfers. 

While some of this is natural, any golfer can hone their touch by consciously thinking about it while playing and spending a put of time on the putting greens. In other words, the best way to become a better putter is to actually go out and practice your putting. 

Tuesday, April 15, 2025

US Sports Ice Hockey: 4 Hockey Passing Drills to Improve Team Performance: Mites to Peewees and Kings vs. Oilers Highlights

 NBA, NHL Playoffs Are Here. Now Streaming On US Sports Radio!

  • By Jackson Chlebowy

Ice Hockey is a fast-paced game that requires precision, teamwork, and quick decision-making. Plays can occur in a matter of seconds, requiring players to think strategically while successfully executing their skills. The dynamic and fast nature of the game makes mastering passing essential for both individual and team performance.  Hockey passing drills are integral for developing accuracy, timing, and communication on the ice. Whether you're a beginner or an experienced player, incorporating these drills into your practice routine will elevate your game and strengthen team dynamics.

Why are Passing Drills Important? 

Passing is more than moving the puck from player to player. It’s about creating scoring opportunities, controlling and maintaining puck possession, and keeping your opponents on their toes. Effective passing can be the difference between a good team, and a great one. At the beginner level, passing drills allow players to develop their accuracy and puck-handling skills. At the more experienced levels, Passing drills allow players to simulate in-game situations where they can learn, adapt, and react to different game scenarios. Hockey passing drills can  improve:

- Puck Control: Learning to pass, and receive passes under pressure will enhance players' ability to control play and keep the puck moving. It will also train players to make smart decisions with the puck to maintain team possession and control play.

- Team Chemistry and Communication: Practicing passes, and passing scenarios will improve team communication and understanding on the ice. Through consistent practice and repetitions teammates will become better communicators on the ice, and learn each other's tendencies or preferences. This can help teams get on the same page, reducing the potential for costly turnovers and broken plays.

- Quick and Intelligent Decision-Making: Hockey is a game of time and space. Quick and accurate passes help your team play faster and more efficiently. Minimizing time spent in possession of the puck will allow your team to rapidly move the puck down the ice or away from danger, exploiting holes in the defense before they are able to adjust or react. This faster tempo can create dangerous scoring opportunities and odd-man-rush situations. 


4 Hockey Passing Drills to Improve Team Performance: Mites to Peewees 

Here are four passing drills, starting with the basics, that will help your team dominate this upcoming hockey season.

Partner Passing

Partner passing is a simple and easy passing drill for building up the basics of giving and receiving a pass. Coach Patrick Burke, a former college hockey player and successful coach explains the fundamentals of passing in his ‘Coaching Youth Hockey: From Mites to PeeWees’ course. Coach Burke has a strong focus on player and skill development and has led championship-winning teams at the high school varsity level. He has years of coaching experience at nearly every level of the game, from mites to college. 

Have each player choose a partner, and line them up 5ft-10ft from one another. Each pair will have 1 puck between them and will practice passing back in forth to one another, focusing on making crisp tape-to-tape passes with their forehand and backhand. Emphasize the importance of “soft hands”, in this drill when receiving and passing the puck.

Passes should be made with a sweeping motion, not a slap. When receiving the pass players should cradle the puck, catching it like a slingshot. This will give the player more control, and allow them to load up for a quick pass back. Make sure players have their heads up when passing and receiving; Looking at their target, not the puck. Once players are comfortable at 5ft-10ft, have them move further and further away.

The Box Drill

null

This is another important drill from Coach Patrick Burke (Click above). In Coach Burkes ‘Coaching Youth Hockey: From Mites to PeeWees’, he explains the importance of following, not watching your passes. 

The Drill is simple. Place 4-6 players in a box or along a faceoff circle. The players will pass the puck to one another, following their pass each time and remaining ready for an incoming pass. This gets players out of the habit of watching their passes and taking themselves out of the play. Young players must understand the importance of moving their feet after passing. Rarely in hockey are plays made while stationary. Getting in the habit of moving their feet, and being ready to receive a pass at any time will allow them to support their teammates and beat their opponents to open space.

2 Player Slot Passing Drill

This is a more intermediate drill that can be used for most skill levels and age groups. The 2-player slot drill emphasizes the importance of timing (from both the passer and receiver) communication and, the ability to cleanly catch and release the puck on the net. Being able to find your teammates quickly, and release the puck effectively in dangerous areas of the ice will help create and convert on more scoring chances.

null

Start by splitting the team into 2 groups (they should alternate groups as the drill goes on), one group at the blue line on either side of the ice and the other group in the corner diagonally across. Set up 2 piles of pucks, one behind the net and the other in the empty corner. The drill will begin at the point with one puck (after this, the drill can continuously run without stopping and starting). Have this player skate into the slot and take a shot on net. After the shot, skate behind the net to pick up a puck. The player in the corner should begin skating around the top of the circle, timing it so that he reaches the apex of the circle as the player with the puck is ready to pass. He/she then receives the pass in the slot for a shot on the net. After the shot, he/she then skates to the far side corner with the 2nd pile of pucks to make a pass to the next player in line at the point. Restarting the drill over again with new players. 

Players throughout the drill should communicate with each other, calling for passes and presenting themselves for scoring opportunities. Never during this drill should a pass be made to a stationary target, players should time their portion of the drill to receive the pass in, or around the slot area.

Breakout/Regroup Drill

The Breakout/Regroup drill is a more advanced drill used to simulate real game scenarios. This drill simulates the breakout/regroup and gives players the opportunity to practice quick decision-making and communication with their teammates. A swift and effective breakout is essential for starting the transition from defense to offense. A well-conducted breakout can alleviate pressure in the defensive zone and create odd-man opportunities going the other way. The regroup and transition game is all about finding open teammates and attacking the weak areas of the ice. Players should keep their heads up at all times, looking to exploit open ice with a pass, or with their feet. Being in the position to make a play is just as important as the pass.

Begin the drill with 2 defensemen on both blue lines (4 total), and a line of forwards at center ice. The coach should dump the puck into a corner for the defenseman to retrieve, beginning the breakout with a D-to-D pass. While this is occurring, the line of forwards enters the zone and swings for a breakout pass. It is important that the forwards time their swing, that way they don't leave the zone too early or force the defenseman to make a dangerous stretch pass that could be intercepted in game situations. They will exit the zone, and pass to the 2nd set of defensemen at the opposite blueline.

 Forwards should cross, and swing presenting themselves for a regroup pass from their defenseman. They will then play 3 on 2 against the original defenseman. Forwards should use this opportunity to get creative and take advantage of the odd-man opportunity.


National Youth Sports Strategy

Everyone has a role to play in the National 
#YouthSports Strategy! Learn more about the strategy and ways to get 
involved from @HealthGov: https://bit.ly/2lQ85f6

Monday, April 14, 2025

US Sports Soccer: How to Structure Practice Sessions: A Complete Guide for Youth Soccer Coaches and HIGHLIGHTS: St. Louis CITY SC vs. Columbus Crew

 Men Still Competing In Women's Sports? Now Streaming On US Sports Radio

  • By Chaz

Great practices don’t happen by accident—they’re the result of thoughtful planning, clear objectives, and an understanding of how players develop over time.

As a youth soccer coach, your job is to create an environment where players can improve technically, grow in confidence, and have fun. Structuring your training sessions with a proven framework ensures you're meeting your players where they are developmentally and helping them build up their skills progressively.

Why Practice Structure Matters

The best youth soccer sessions follow a logical progression—from learning a technique, to applying it under pressure, to executing it in a game-like setting. This structure mirrors how players naturally learn and adapt. When practice is organized with intention, players are more engaged, better prepared for game situations, and ultimately, more successful.

The 3-Part Practice Framework

Let’s break down a typical session into three phases: Beginning (Individual Technique), Middle (Small-Sided Pressure), and End (Game Conditions). This model gives you the flexibility to focus on different skills while creating consistency and flow in your coaching style.

1. Beginning: Teach the Fundamentals (Individual Work)

This is where players are introduced to the technical focus of the session—whether it’s passing, dribbling, shooting, or defending. There should be no defensive pressure, allowing players to gain confidence and proper technique at their own pace.

Introduce the concept or skill with a clear demo.

Have players perform the skill individually.

Set individual targets (e.g., 10 successful passes with both feet).

Progress to performing the technique at game speed.

By the end of this phase, every player should understand what the skill looks like and feel comfortable executing it in a controlled environment.


2. Middle: Introduce Pressure (Game-Related Skills)

Now it’s time to challenge players by adding a layer of passive or active pressure. Think 1v1, 2v2, or 3v3 scenarios where players must apply the skill in a competitive setting. This builds decision-making and reinforces the technique in more realistic conditions.

Start with passive pressure (defenders give light resistance).

Gradually increase to full pressure (defenders try to win the ball).

Encourage creativity, quick decision-making, and spatial awareness.

Rotate roles so every player experiences offense and defense.

This phase transitions the skill from isolated practice to situational awareness and reaction—critical for real-game success.

3. End: Simulate Game Conditions

The final portion of practice should look and feel like the actual game. Use small-sided games (e.g., 4v4, 5v5) with coaching conditions that reinforce your technical focus. This allows players to apply what they’ve learned in an open environment.

Use short-sided or odd-numbered games to increase touches and decisions.

Add specific rules to emphasize your focus skill (e.g., 2-touch max, must complete 3 passes before shooting).

Encourage communication and team play.

Give players feedback, but let the game teach too.

Game-like drills bring intensity, excitement, and real pressure to your session. This is also the phase where fun and competition can truly shine.

Free Practice Session Planning Template

Use this simple template to prepare every session with confidence and structure:

Warm-Up (10 mins) Objective: Get players moving, increase heart rate, light technical work Examples: Dynamic stretches, dribbling relays, rondo keep-away

Beginning Phase (15–20 mins) Objective: Introduce technical focus in isolation Examples: Passing pairs, cone dribbles, shooting on open net

Middle Phase (20 mins) Objective: Apply technique under pressure Examples: 1v1 challenges, 2v2 games, transition drills

End Phase (20 mins) Objective: Simulate game conditions with constraints Examples: 4v4 games, small-sided scrimmages with touch/pass rules

Cool Down & Recap (5 mins) Objective: Stretch, reflect, give feedback Examples: Static stretching, quick Q&A, positive reinforcement

Final Thoughts

There’s no single “right” way to coach—but having a clear, structured approach to every practice will elevate your players’ development and make your job as a coach more rewarding. Build your sessions around a purpose, adapt to your group’s needs, and never forget to keep it fun.

Remember: when players are learning and enjoying the game, everyone wins.

Further Learning

For coaches working with players ages 10 and up, Nick Harrison offers a valuable course on CoachTube that expands on the ideas shared here. It covers session planning, skill development, and age-specific coaching strategies.

Explore the course here: Coaching Youth Soccer: Ages 10 and Up0 and Up

Thanks to Nick Harrison for sharing his insights and helping coaches continue to grow.

Sunday, April 13, 2025

The Rock Almighty: The Equality of the Fallen and Turn Up For Who?


 You Know It! Christ-Centered Rock 'n' Roll For Your Soul. The Rock Almighty Shaker Of Heaven And Earth. Now Streaming On US Sports Radio!

  • Author Justin Patton

My friend Jason recently shared a great excerpt from Kierkegaard’s “Practice in Christianity,” in which S.K. identifies an important truth. Though the means through which we are drawn to God are many, Kierkegaard says they converge at the consciousness (i.e. awareness) of sin. Don’t let the word “sin” scare you off. Feel free to exchange it with “wrongness” or “evil” (people have all sorts of things they think of as wrong or evil).

Humans have always been keenly aware of the bad behavior of the other guy. Take me, for instance. I’m aware of how self-assured many people around me seem to be. What is it that they are so sure of? Mostly how bad the people are who differ from them politically. But it hardly requires a difference in politics to reveal our ungracious natures. When even the smallest of inconveniences come my way, I tend to assume the worst of others as well. “The mailman didn’t bring the package up to the house? I was waiting for that delivery! What a lazy, no good…” Sometimes I wonder if our entire existence doesn’t revolve around a constant, exhausting moral examination of ourselves and others, and not very often are we impressed with anyone.

I wrote my first story, The Battle of the Windy Isle, with this ethos in mind. I wanted to tell a tale about a curse that afflicted people in different ways. Those who were cursed remained largely unaware of it, having slipped into the malady more deeply over time. However, simple things, such as gratitude, joy, or forgiveness, could sneak in and undo the damage with surprising speed.

Early on in the story otherworldly curses are foreshadowed by the more familiar, earthly variety. This occurs in a conversation between a grandfather and grandson when the grandfather responds gracefully to a difficulty. However others, like his grandson Aisen, find that graciousness difficult to understand. As the story progresses Aisen begins to recognize the value of forgiveness, and eventually demonstrates some very grandfather-like responses of his own.

The Windy Isle is a children’s story, but sometimes it is parents (even Christian parents) who struggle to prioritize forgiveness. Society doesn’t always help us maintain a gracious mindset, either. While we do see some moments of grace celebrated, too often forgiveness seems to be confused with weakness. We are tempted to believe that finger-pointing and condemnation are the virtuous things—regardless of (or maybe because of?) our political or religious persuasions. But if we must err, in which direction should it be? I submit (and I think the Bible teaches) that we should err on the side of forgiveness. Such a choice is costly, to be sure, and our pride makes it all the more difficult.

C.S. Lewis explained the issue this way: “How is it that people who are quite obviously eaten up with pride can say they believe in God and appear to themselves very religious? I am afraid it means they are worshiping an imaginary God.” The curse of imagining a God in one’s own image—repulsed only by the evil of other people—slips in bit by bit and remains mostly undetected by the one afflicted. Yet the awareness of sin that Kierkegaard spoke of remains, albeit in a hobbled form.

However, if that handicap begins to heal, the consciousness of sin can still be a means through which we may yet be drawn to God. We must come to see the flaw in ourselves as well as in others. My hope is that readers of The Windy Isle will grow in the awareness of the “equality of the fallen”—and we all fit that bill. It is for this reason that we should view ourselves as better than no one. It is a choice that presents itself often.

As Lewis said elsewhere, choices are significant things: “Every time you make a choice you are turning the central part of you, the part of you that chooses, into something a little different than it was before. And taking your life as a whole, with all your innumerable choices, all your life long you are slowly turning this central thing into a heavenly creature or a hellish creature: either into a creature that is in harmony with God, and with other creatures, and with itself, or else into one that is in a state of war and hatred with God, and with its fellow creatures, and with itself. To be the one kind of creature is heaven: that is, it is joy and peace and knowledge and power. To be the other means madness, horror, idiocy, rage, impotence, and eternal loneliness. Each of us at each moment is progressing to the one state or the other.”

Or, if you recognize the connection between graciousness and gratefulness, perhaps a more condensed way of putting it is this:

“The distance between being ungrateful for something and cursing it is not as great as one might imagine.” — Virgil, Battle Chief of Linraw (from The Wizard’s Rebellion)

Justin Patton is an instructor at Murray State University because audio professors don't need PhDs and have just enough free time to write fantasy stories. His books and blogs can be found here https://www.amazon.com/dp/B08PDR6FMS and here https://justinpatton.wordpress.com/

Saturday, April 12, 2025

US Sports Track and Field: Olympic Medalist Jasmine Moore’s Triple Jump Approach Technique Keys and Women's triple jump final World Athletics Indoor Championships


  • By Grant Young

Triple jump coaching is a highly technical art, where the best coaches understand how much success hinges on perfecting the approach run. While many spectators focus on the explosive phases after takeoff, elite jumpers know that a consistent, powerful approach makes all the difference—and few understand this better than Jasmine Moore, the Paris Olympics bronze medalist.

The approach in the triple jump isn't merely a run-up; it's the foundation for everything that follows. A well-executed approach:

- Builds the optimal horizontal velocity that converts to distance

- Establishes rhythm and consistency for the technical phases

- Creates the momentum that carries through all three jumps

- Positions the athlete perfectly for takeoff

Moore's approach technique has become her signature strength. Her bronze medal performance in Paris demonstrated how a precisely calibrated approach can elevate an athlete to the Olympic podium.

Moore's approach technique stands out for several reasons:

1. Her approach features remarkable consistency—she hits the takeoff board within centimeters nearly every attempt. This precision comes from countless repetitions and her methodical step-marking system.

2. Unlike many competitors who sacrifice control for speed, Moore maintains perfect posture throughout acceleration. She stays tall, avoiding the common mistake of leaning forward too early, which preserves energy for the explosive phases.

3. Moore's final three strides show a subtle but crucial lowering of her center of gravity—what coaches call "active touchdown"—preparing her body for the powerful conversion from horizontal to vertical movement.


Perhaps most importantly, Moore has mastered the psychological aspect of the approach. She remains composed under pressure, executing her runway pattern identically whether in practice or Olympic competition.

For triple jumpers looking to improve, studying Moore's approach technique offers invaluable lessons in the blend of speed, rhythm, and technical precision that creates championship performances. Her bronze medal in Paris was built on this foundation, proving that in the triple jump, mastering the approach truly is the key to success.

Of course, there’s more to Moore’s triple jump mastery than these basic fundamental components. But nobody is better equipped to explain the nuances of triple jump success than her. That’s why we’ve pulled several pertinent pieces of Moore’s wisdom from her ‘Triple Jump Mastery: Power, Precision, and Technique with Jasmine Moore’ clinic from the Texas Track and Field Coaches Association and are sharing them below for you. 

Drive Phase Approach

null

Coach Moore explains that the drive phase of the triple jump is the first third of the approach. Here, the focus needs to be on powerful pushes, which is extremely different than bounding out the back. 

The difference is that purposeless bounding is going to take away from momentum rather than increase it into the next phases of the jump. Therefore, each push needs to have a clear intent. 

Coach Moore also emphasizes the importance of the very first step because of how it creates consistency and helps solidify the rest of the approach. She also suggests using some type of physical marker on the ground to ensure that the first step is in the right position.

When training this phase of the triple jump, Coach Moore notes that she always focuses on keeping her chest up, because having the chest down typically causes the body to have more of a bounding approach, which isn’t ideal. 

Continuation Phase Approach

The next phase Coach Moore discusses is the continuation phase, which follows the drive phase and is focused on covering ground. Her main goal during this phase is to keep running aggressively, which means standing up, being in the correct body posture, nailing the running mechanics, and being keenly aware of where she is on the track. 

While mechanics are crucial for every phase in the triple jump approach, Coach Moore seems to think they’re most important during this continuation phase because this is when a lot of fouls and penalties happen, which can derail an entire jump.

Transition Phase Approach

null

Coach Moore then goes on to discuss the final phase of the triple jump approach, which is the transition phase. 

She explains how this phase consists of the last 4 to 6 steps of the approach. The main goal of this phase is to create and maintain the maximum speed possible as one gets to the board and begins the eventual jump.

Coach Moore is a big proponent of having what she calls a “mid mark” during this phase, which is a way to gauge where the runner is in their approach. It should be positioned about five steps out from the jump for each runner, which is about 28 feet for Coach Moore. 

If an athlete is on their mid mark perfectly and on the board perfectly, they did their job. But if they end up a foot or so in front of the mid mark but on the board perfectly, the athlete was probably stuttering in their lead-up. 

If the athlete is behind the mid mark, then they’re probably reaching, which would also require a mechanical adjustment from the coach.

Coach Moore also reiterates that the athlete’s posture and hips must remain upright as they enter the board, because the chest or hips being down will not lead to an optimal take off.


https://odphp.health.gov/sites/default/files/2019-11/role-model.png
Want to help kids #GetActive through youth sports? 
Learn how parents, coaches, and volunteers can get involved in 
@HealthGov’s National #YouthSports Strategy: https://bit.ly/2lIHPUc