Now Streaming On US Sports Radio!

US Sports Net Today!


Live Play-by-Play, Updates, Highlights and More! on US Sports Network!
[Chrome Users-You may have to click on the play button twice to listen]
US Sports Network Powered By Gorilla Sports!


US Sports Radio
The Las Vegas Raiders Play Here
Fitness and Sports Performance Info You Can Use!
The Scoreboard Mall
The Rock Almighty Shaker Of Heaven And Earth!
The Coolest Links In The Universe!

Monday, February 3, 2025

US Sports Martial Arts: How to Teach Basic MMA Striking and Jake Peacock Stole The Show In His ONE Debut 🤯


How to Teach Basic MMA Striking

  • By Grant Young

Stepping into the gym for one’s first MMA (or any other martial arts) class can produce crippling anxiety. 

Not only is there the inherent feat that the practitioner will make a fool of themselves in front of more experienced peers, but the stakes of failure in a combat sport are much higher (meaning, more painful) than in just about any other sport. 

While all aspiring martial artists will need to enter the gym and test their skills eventually, learning a few basic techniques from a MMA course online is a fantastic way for them to develop their striking base without subjecting themselves to a strict martial arts coach or unforgiving classmates. 

Having a simple, straightforward way for coaches to teach these basic techniques is also a great idea to make the initial MMA endeavor for students more digestible.

And Constellation 52 Global (C52G) has the teaching of MMA striking’s most important techniques down pat. 

Constellation 52 Global (C52G) is a Martial science program based in Maryland that’s dedicated to genuine 52 Blocks Combat, Culture & Fitness, and focuses on the tri-star method of the 52 experience. The program’s “52 Combat” is a stellar Boxing and Self-defense program that is taught by genuine Instructors who have earned their community's respect.

52 Blocks is a simple system but inside its simplicity lays layers of complexity discovered by the practitioner. The number 52 represents the geometry that the hands take while defending/shielding the body from harm.

This is why Constellation 52 Global’s ‘52 Blocks MMA’ course is an excellent tool for new students and martial arts coaches alike. Not only will it teach them how to be an effective striker in MMA, but their course also emphasizes how to shield oneself from harm while delivering offense. And as any martial artist knows, having a solid defensive base is even more important than having a solid offense. 

Basic Strikes

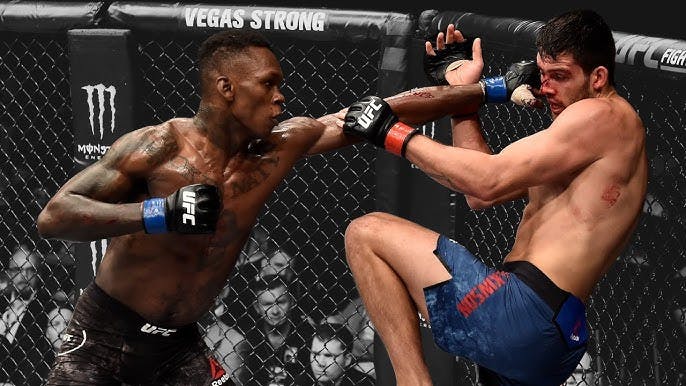
The jab is the most important strike in MMA (and in any other striking sport) because of how simple, quick, and effective it is. But just because the jab is simple doesn’t mean that it’s necessarily easy to throw, nor that it’s impossible to mess up.

This is why any basic striking course for MMA should always start with some basic information on how to best throw a jab. 

C52G notes that before the jab technique, fighters should be sure that they’re postured in an athletic position with their torso pointed slightly outwards, their face directed toward their opponent, and remaining light on their feet with their hands up near their cheeks/temples for defense. 

When the jab is thrown from this position, the first movement should be with your lead foot (left foot for righties, right foot for lefties). The foot should be stepping between 3-6 inches forward and slightly outward while the punch is thrown. As for the jab itself, it will be thrown with the lead hand and should be thrown in a slightly upward direction. 

The reason the jab should be practiced getting thrown slightly upward is because it will help prepare for facing a taller fighter, and will also train the puncher to keep their chin tucked under their shoulder while they’re throwing the jab. 

Just as important as throwing the jab is bringing that lead hand right back to its position beside your cheek/temple regardless of whether you land the punch or not, your lead side will be susceptible to a counter-punch if your hand doesn’t quickly return to its starting position. 
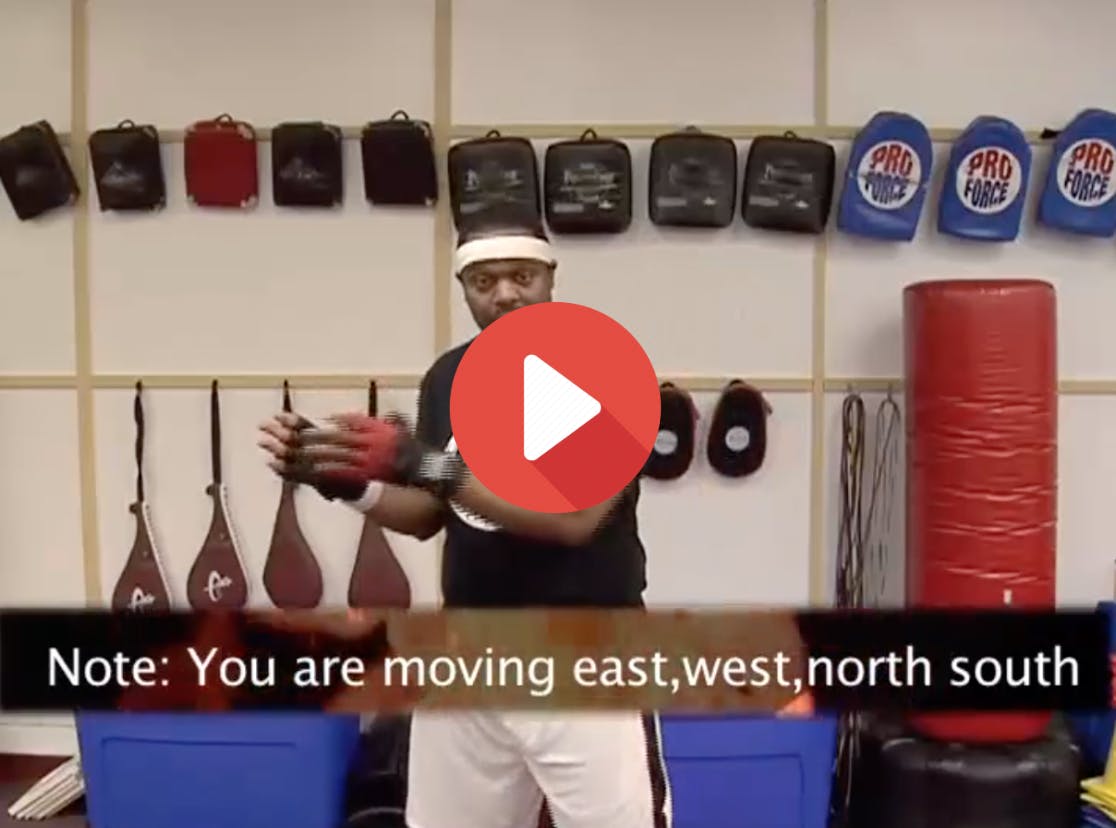
Basic Footwork

null

While the jab is the most important punch in combat sports, the second most important is the cross. 

The cross is thrown with the rear (strong) hand and generates more power than the jab. The footwork involved with throwing a cross is also imperative if the puncher wants to maximize their power output and generate as much damage as possible. 

For this, C52G says that a great concept to consider for striking footwork is dividing the floor beneath you into quadrants, sort of like the points on a compass (North, South, East and West). When you’re trying to get within striking or grappling range with an opponent, it would be wise to not just move North on the compass in a completely straight line, because that will lend itself to receiving offense from your opponent. 

Instead, C52G suggests that one should be moving laterally to avoid incoming attacks while also moving forward to get within one’s range. A good way to think about it is moving either northwest or northeast in order to get within range and land offense against your opponent while staying off of the center line. 

Combos Off The Slip Inside

Another integral part of MMA striking defense (along with every other striking combat sport) is the slip. 

A slip is a defensive technique that involves moving the head to the side to avoid a punch. When performed correctly, slipping is a major tactic that allows the fighter to not only avoid an opponent’s offense quickly but also position them to offer a counterpunch while their opponent is still reeling from missing their shot. 

Because the right cross is generally thrown with a lot of power, this means the person throwing it can become off balance, and therefore susceptible to getting slipped and countered. 

To do this, an orthodox (right-handed) MMA fighter would want to have their opponent’s cross timed, see it coming, then step off and move their head to the left when the cross is getting thrown.

This will put them on the right side of their opponent’s body, which will be wide open for a counter punch or a knee to the liver (or to the head). In addition, a grappler would want to take advantage of this and shoot for a takedown while their opponent of off balance. 

Sunday, February 2, 2025

US Sports Volleyball: Three Small Group Training Drills to Improve Your Volleyball Team and April Ross The Greatnes Of A Champion


Three Small Group Training Drills to Improve Your Volleyball Team

  • By Grant Young

Volleyball stands out as the ultimate team sport due to the high degree of cooperation and communication it demands among teammates. As opposed to individual sports, volleyball's success hinges on the collective efforts of all team members working toward a shared objective. Each player carries a specific role, and the team's triumph relies on everyone effectively fulfilling their responsibilities. Hence why having effective volleyball coaching lessons is so crucial. 

What truly sets volleyball apart as a great team sport is the constant need for communication. Teammates must consistently communicate to coordinate movements, call out plays, and provide support. This level of communication fosters a strong sense of camaraderie and unity among team members, as they rely on each other both on and off the court. 

In addition, the fast-paced and dynamic nature of volleyball necessitates quick decision-making and adaptability, both of which are significantly enhanced by teamwork. Players must be constantly aware of their teammates' positions and movements to make split-second decisions and adjustments during a game. 

Overall, the combination of communication, trust, reliance, quick decision-making, and adaptability makes volleyball the ultimate team sport. It not only promotes physical fitness and skill development but also fosters essential life skills such as working collaboratively, effective communication, and adaptability. 

While this is all true, many volleyball coaches that they get better results during practices when they train in smaller groups, as opposed to the whole team. Ashlie Hain is among them. 

Coach Hain is the Head Women's Volleyball Coach at the University of California Irvine (UCI). Hain, a two-time team captain and setter for the Anteaters, played at UCI from 2001-04 and is still the career leader in assists with 5,698. She returned to UCI after coaching at American River College (ARC), amassing 127 wins in six years there and being voted the Conference Coach of the Year as well as the Northern California Coach of the Year in 2013. 

Coach Hain’s ‘Inside Volleyball Practice Vol. 2 featuring Coach Ashlie Hain’ course covers numerous techniques and drills with an emphasis on high-intensity repetitions within small groups. This video is an excellent resource for volleyball coaches or players at any level of competition.

Bowling Series

null

One drill that Coach Hain loves employing is what she calls the Bowling Series drill. 

This begins with a group of three players, and is meant to emphasize passing and receiving the ball along the midline. From there, two players will line up on one side of the net while facing a third player, who is standing in front of one of the two players in a ready position. The drill begins with one of the two players underhanding a ball to the lone person, who bumps it back to them before shuffling horizontally in front of the other player, who then underhands the ball they’re holding. 

The player will continue moving back and forth between the two players until they do about six reps, at which point the three players will alternate positions so that a new player is standing alone. 

The next aspect of this series involves each of the two players tossing the ball diagonally for the shuffling player, which will create a unique angle to hit. There are multiple other variations this drill can take, including the two players who are underhanding standing at differing distances, so that the player who’s bumping the ball must shuffle forward and backward instead of laterally. 

The goal for this series of drills is to get the players active and moving while keeping their eyes trained on the volleyball, which will be coming at them from different angles to mimic game-like scenarios. 

Tooling the Block

In volleyball, tooling the block is a volleyball attacking move where a player hits the ball into the block and out of bounds to score a point. It's also known as "block out".

To tool the block, a player hits a weaker part of the block, such as the top where the hands are, so the ball changes direction and is deflected out of reach of the defenders. Because this can be a difficult technique, Coach Hain uses a Tooling the Block drill to help her players improve at it. 

This drill begins with a line of five players on one side of the net, with a coach and a bucket of balls on that same side. Another coach will be on the other side of the net, standing on something with their hands up to mimic a blocker. Then each player will take turns bumping the ball off of the coach’s outstretched hands to replicate what tooling the block will be like. 

In this drill, coaches should be looking to ensure their players are seeing the block and scoring off the block by using a variety of different tips and shots off of it. 

Serving to Different Areas

Developing an effective serve is crucial to scoring points in volleyball. In order to address this, Coach Hain divides the other side of the court up into different segments, splits the group into two lines of three, and has them competing against each other to position their serves at select spots on the court. 

The main goal of this drill is to get players comfortable hitting serves to all areas of the court, and making sure players vary where they’re hitting their shots. Adding the competitive element will make the drill much exciting, and should enhance the drill’s success. Coaches also have the option to add a consequence for the losing team, like doing extra conditioning or having to shag all of the hit balls.

Saturday, February 1, 2025

US Sports Softball Feat. How to Maximize Your Softball Pitcher's Abilities and College softball's top 12 transfers for the 2025 season


How to Maximize Your Softball Pitcher's Abilities

  • By Grant Young


There are many components that go into developing a softball pitcher. Not only must the player remain durable and prepared to pitch a team’s every game, but they also must have the mental makeup to endure the rollercoaster ride that playing an entire season provides. 

And even if a pitcher has all of the physical skill sets in the world, if they haven’t developed just as sturdy of a mental framework to consistently compete at a high level, they won’t be able to lead your team in the way that softball pitchers must. 

Thankfully, developing pitchers isn’t as difficult as it may sound; at least, as long as you have good coaches to learn the correct development techniques from. 

Esteemed softball coaches Lisa Fernandez, Paige Cassady, and Courtney Hudson have all constructed courses that impart their wisdom on how to develop physically skilled and mentally sturdy softball pitchers and are willing to share those insights with you. 

Lisa Fernandez - The Journey of a Pitcher’s Developmentsoftball/the-journey-of-a-pitchers-development-with-lisa-fernandez/14023335">The Journey of a Pitcher’s Development

null

Lisa Fernandez is arguably the greatest pitcher in softball history. Fernandez is a three-time Olympic Gold Medalist, having helped Team USA to victories in the 1996, 2000 and 2004 Olympic Games. In 1996, she went 1-1 with a 0.33 ERA in softball's inaugural appearance in the Olympics in Atlanta. Her ERA ranks second in NCAA history and her 74 shutouts are ninth-most in the NCAA’s record books. She is entering her 26th season on the UCLA Bruins coaching staff in 2024.

In her ‘The Journey of a Pitcher’s Development’ course, Coach Fernandez says, “A lot of times, pitchers will have consequences that affect their mindsets. ‘Oh, this batter could do this. She could hit this pitch out. You can’t have that mentality. You have to have the mentality that you are going to be successful.”

Coach Fernandez notes how it’s natural for not just pitchers, but all people, to have negative thoughts swirling around their heads during high-pressure situations. That’s why softball coaches must utilize positive reinforcement in order to bolster their players’ confidence on the mound. 

Succeeding as a pitcher is more about conquering the mental game than anything else. And if a coach can create a habit of having confidence in their pitcher when they’re on the mound, that isn’t just going to help with the wins and losses. It’s also going to help that young pitcher in all other facets of life. 

Paige Cassady - ‘A Holistic Approach to Developing Pitchers Throughout the Year’ach-to-developing-pitchers-throughout-the-year/17969322">A Holistic Approach to Developing Pitchers Throughout the Year’

null

Paige Cassady joined NC State University’s softball team in 2023, as an assistant coach with a focus on pitching. Prior to that, Coach Cassady worked as a pitching coach at Texas Tech University. Before that, she spent nine seasons as the pitching coach at Liberty, where she helped the pitching staff lower its ERA every season. She received national recognition after the 2018 campaign when she was tabbed Assistant Coach of the Year by the NFCA. 

Coach Cassady believes there are six components to developing a softball pitcher. Within each component, she provides specific guides, hallmarks, and mantras that can lead coaches to develop those skills within their pitchers:

Training - Create an environment that is stimulating. Motivation, Expectation, Competition. 

Endurance - Remember your why. The Carrot Seed. No timelines.

Breathing - Wim Hoff Method, Headspace, Heart rate, Breathe by James Nestor.

Stress Response - Reframe. 40% rule. Disney+ Limitless, Substitutes for experience.

Psychology - Brian Cain, Dawn Grant, MUSE, ESPN+ Enhanced Series, Prioperceptive Effectiveness.

Routines - Bullpen, Gameday, Pre-Pitch, Dugout, Roles.

One way that Coach Cassady tries to tap into all of these six components is during bullpen sessions, where she has her pitching staff compete against one another. Yet, she also makes clear that she doesn’t compete solely for competition’s sake. Rather, she likes these bullpen battles because she, “wants to set the standard.”

Coach Cassady explains that her pitchers are competing against who they want to be in these bullpens. They’re trying to get the most out of themselves. And in that way, they’re really only competing against themselves. And what better way to develop one’s physical and mental capabilities than for them to push themselves in a low-stress environment, surrounded by support?

Courtney Hudson - ‘Pitcher Development Program’om/course/softball/pitcher-development-program/8413051">Pitcher Development Program’

Courtney Hudson is a former Division II softball player and coach. She made two trips to the Division II College Softball World Series, in 2009 and 2011. In her three seasons serving as a pitching coach, Coach Hudson’s staff compiled a record of 143-24. She has over 16 years of experience coaching fastpitch softball pitchers. Coach Hudson is the owner of Engineered Performance Lab in Huntsville, AL where she programs data-driven exercise and training for baseball and softball athletes. 

In the ‘How to Complete Your Game Day Performance Plan’ section of her course, Coach Hudson notes that 40% of practice time for softball pitchers should be dedicated to ‘How to Get Batters Out’.

Coach Hudson notes that there are three goals when it comes to getting batters out: 

1. Change bat speed

2. Change eye level

3. Move feet

We aren’t going to detail what all three of these mean, because we can assume that you understand what this means for a softball pitcher. But the most important aspect of these three goals we want to shed light on is how Coach Hudson is speaking about and working on these during practice so that her pitchers understand how to do so in games themselves.


A crucial part of developing a pitcher is getting them to understand the art of pitching. While pitch grips play a part in this, there is so much more nuance to effectively and efficiently getting a hitter out; which is what Coach Hudson’s three goals all allude to. If a pitcher is thinking about how to get a hitter out, they’re not thinking about all that could go wrong. That’s what development is all about. 

As you can see, there is a lot that goes into developing a softball pitcher that has nothing to do with physical components. But if your pitchers can master pitching’s mental side, they’ve already won before the first pitch is thrown

Friday, January 31, 2025

US Sports Golf: Two Main Principles For Improving Your Golf Short Game


Great Golf Drills Vol. 2 - The Short Game featuring Dr. Gary Wiren

  • By Grant Young

The short game in golf can be the most challenging aspect of the sport for many players. While hitting long drives off the tee may seem impressive, it's the finesse and precision required for chipping and putting that can truly make or break a golfer's game. Mastering the short game demands a great deal of skill, touch, and concentration. 

Unlike the full swing, which allows for some margin of error, the short game requires a high level of consistency and control. Ultimately, success in golf often comes down to proficiency in the short game, and those who can excel in this area are likely to see significant improvements in their overall performance on the course.

And when done well, the short game can be golf’s most satisfying aspect. Successfully executing a delicate chip shot to get the ball close to the pin or sinking a long putt can bring about a sense of achievement that is hard to replicate in other aspects of the game. The short game also offers opportunities for creativity, as players can employ various techniques and strategies to navigate around hazards and onto the green. 

Additionally, the short game often plays a crucial role in determining a player's overall score, making every successful chip, pitch, or putt feel like a significant accomplishment.

All of which is to say that it’s worthwhile to try and improve your short game. And online golfing coach legend Gary Wiren is here to help you do so. 

Coach Wiren is a member of six Golf Halls of Fame, including the PGA Hall of Fame and the World Golf Teachers Hall of Fame, and has honorary memberships or distinguished service recognition from Sweden, Italy, New Zealand, and Japan. Wiren was a collegiate conference champion, won the South Florida Seniors PGA title, and the South Florida long-driving championship, played in the USGA Senior Open and the PGA Senior Championship and has won the World Hickory Championship. 

Coach Wiren’s Great Golf Drills Vol. 2 - The Short Game featuring Dr. Gary Wiren course will teach you which shots to play in different situations, how to develop the touch necessary for a great short game, and will help you to learn the correct principles of practicing the short game and dramatically lower your scoring average.

Dialing For Distance

The first (and most crucial) point when deciding which clubs to use when attempting to land a shot on the green is knowing how far away you are from the hole. 

The best way to do this is with experience. The more you’re out on the golf course, the better you’ll be at gauging distance. But if you’re relatively new to golf, a great way to know is by using the yardage markers placed along the length of the hole. Better yet, if you have access to a yardage book for a template for the gold course you’re at, this can be an incredibly useful tool. 

Once you calculate an estimated range from your ball to the hole, you’ll want to have a good understanding of how far back you want to take your swing. For example, if you’re ten yards away from the hole, you’ll want to swing so that your club head goes about parallel to your knee during your backswing. If you’re about 20 yards away, your backswing will be around parallel to your hip. A 35-yard chip shot will make your backswing go about to your bicep, and so on. 

Again, repetition is paramount when it comes to deciding which club to use. This is where getting reps in on the driving range is vital because you can test shots and distances with each club to see which best suits you at each distance. It would also be wise to keep a notebook, telling you which clubs you like at certain distances. 

The Right Direction in Chipping

One drill that Coach Wiren loves to utilize when helping students with their chipping direction is placing a club on the ground next to their ball that can help them line their shot up, so they can see where the club of their swing goes through to the target. 

After doing this for enough repetitions, students should be able to envision that imaginary club on the ground while they’re playing, which will be useful in lining up a straight shot. 

Coach Wiren suggests that, when it comes to knowing where the ball should be positioned between your legs when taking a shot, what you can do is stick a tee in the tops of your club’s grip, place it in front of your sternum, and look downwards. The tee should be about ½ inch in front of where you see the ball on the ground beneath it. If that’s where it is, your ball is in the correct position. 

Principles For Putting

null

Coach Wiren explains how there are main principles for putting success:

1. Stroke Mechanics 

This is essentially learning to swing the putter smoothly, like a pendulum swing. This can be learned in a week.

2. Reading the green

Learning how to accurately read a green can take a lifetime, but some tips Coach Wiren is to imagine that every putt is a straight putt in your mind. In other words, if the green has a slope, you should be still executing a straight putt that accounts for the slope and any other factors that will affect how the ball travels. 

He also goes on to note that reading the green is also about pace, which means gauging how hard to hit the ball. While this will take time and experience, imagining a straight line in your head can improve how well you’re able to read the green.

Thursday, January 30, 2025

US Sports Hockey: Ice Hockey Goalie Drills: Mastering the Basics


Winning Hockey Goaltending featuring Coach Richard Shulmistra

Ice Hockey Goalie Drills: Mastering the Basics

  • By Emma Martin

Overview

The goaltender position is one of the most important jobs on the ice. They are the ultimate defender, the ultimate player. Goalies need to be prepared to make or break periods, games, championships. How can you prepare?

It always goes back to the basics. Mastering simple goalie skills will build a solid foundation for when you level up your training. Perfecting even the most simple skills can separate being good from being great. So, let’s go over some helpful hockey drills that can provide that strong foundation.

International goalie coach Hiroki Wakabayashi includes three important skills in his online ice hockey goalie training courses. Quick Feet, Hand Eye Coordination and Reaction drills. 

Quick Feet

What better way to defeat your opponent than by simply being faster? Due to the extremely fast pace of hockey, speed is everything. Goalies must be prepared for one shot after the next, with no time to spare. 

The drills to help goalies master quick feet is practicing defending shots on goal from all angles with just seconds in between. The “two shots and around drill” is a great example of this. The first shooter will take one shot from the face off dot and one from the bottom of the circle. The first shooter will then go behind the net and make a pass to the second shooter on the short side. This drill gives the goalie little time to adjust to the third shot and forces them to practice quick feet. 

A similar drill to practice quick feet is the “One Shot Long Pass”. This drill substitutes the pass behind the net to in front, which increases the pace and forces the goalie to make even faster decisions on their feet. 

To execute the “One Shot Long Pass” drill, you will set up one puck on the top of the circle and one on the faceoff dot, as seen above. The first shooter will take a shot from the top of the circle then quickly pass the puck from one side of the faceoff dot to the other where the second shooter will quickly shoot. 

There are various ways to mix up the shooting and passing patterns in these drills that will force the goalie to practice quick feet. These rapid drills will prepare goalies for real game paced plays and help them to stay one step ahead of the opponent.

Hand Eye Coordination

Keep your eyes on the puck! This one may seem obvious, but practicing hand eye coordination drills will first help you track the puck, then help you adjust your body movements accordingly. 

Pair juggling is one of the most simple drills a goalie can do to maintain a quick reaction time while enhancing their hand eye coordination. This drill is simple, yet crucial. All it takes is a partner, or even a wall. 

For straight circulation juggling, you will toss your ball from your right hand to the partners left hand as you catch the ball from the partner with your left hand.

For 3 balls circulation, you will be catching with your right, hand it to your left and toss it to the partners left hand. 

For Cross Exchange juggling, toss your ball from your right hand to the partners right hand as you catch the ball from the partners left hand to your left hand. 

Similar to the quick feet drills, this drill can be differentiated with slight adjustments. Practicing different juggling patterns will help improve both the body and the mind, ultimately boosting coordination between the two. This fun and simple drill will allow you to work more parts of your body than you may even realize.  

Reaction Time

Sometimes there is no time to think, only react. This is often the case for most ice hockey goalies. Reaction drills combine the importance of quick feet and hand eye coordination all in one. Quick hands drills are a simple way to master making saves with minimum movement. 

One simple reaction drill is “Quick Hands Short-Side”. This is when two shooters take short-side high shots alternately from the inside hash marks. The goalie stays in butterfly position on the goal line and tracks the shots. You can then repeat that but with the shooters taking far-side high shots. Alternating blocking shots between your short side and far side will increase your reaction time and force you to adjust. 

Another beneficial drill for practicing reaction time for when the shot is much closer is the “Gunslinger”. The puck will be on the crease and the goalie is on the goalie line, as seen below. The shooter has one second to take a shot and the goalie attempts to stop it. Wakabayashi touches on the importance of being patient enough to not make the first move. 

Goalkeepers must also be able to react fast, despite where the shot is coming from. How will you react to a fast break? How will you react to a shot coming right from the crease? Your reaction is only successful if made at the right time. These reaction drills designed by Wakabayashi help you understand both how and when to react, preparing you for every possible scenario. Reaction time can be what makes the difference between a save and a goal. Which will it be for you?

Summary

These basic drills will help you build a strong foundation and prepare you for real game time scenarios. Wakabayashi has worked with goalies from the beginner to the professional level in various countries and has found these drills to be useful. Wether just starting, touching up on or mastering your goalie skills, these drills are crucial to improve your game.

Wednesday, January 29, 2025

US Sports Soccer: Best Soccer Defense Drills and Soccer Tips and Techniques - Passing Drill featuring Coach Gerhard Benthin


Soccer Tips and Techniques featuring Coach Gerhard Benthin

  • By Damilare Ilyiade

A team’s defense that is too susceptible to the opposition’s attack is most likely to concede lots of goals and lose matches even if they have got the best forwards in the league. This is why teams need to make use of efficient soccer defense drills if they want to stand the chance of having one of the strongest backlines in the beautiful game.


Aside from that mentioned above, soccer teams that are highly knowledgeable in soccer defense drill tactics and techniques of playing defense during a match are more likely to have the ball and be able to create chances.


What are the Fundamentals of Coaching Defense?


Apart from the fact that pressure, cover, and balance make a defense keep good shape, those attributes are the foundations when creating soccer defensive drills. 


How do these Three Factors Differ from Each other? 


The closest defender to the ball in a soccer match have always been taught to apply pressure to the ball. This could force the attacker into a mistake or the dispossession of the ball from the attacking player’s end. Both the pace of the press and the direction are factors that can influence whether the defender wins the ball or not.


Balance is the ability of a team to position itself in an excellent defensive posture to prevent the switching of the ball to off-balance the defense.


Cover as a defensive positioning gives instant support to the pressuring players by positioning themselves near the pressure.


In this section, you will learn top-notch defensive soccer drills that will help you make your players work as a unit at the back without leaving out interesting ways they can help their defenders react in different defensive situations. 


Teaching 1st Defender without Opposition

null

Objective

The objective of this drill is to let young defenders understand the necessary things they need to do when they are the closest to an opponent with the ball. 


Set-Up

A fully-sized goal is needed for this drill. The next thing you need do is to separate the team into two groups of defenders to start on both sides of the goal and also make sure that two attacking players with the ball are positioned outside the penalty area on both sides of the attacking final-third of the field. 


Execution

The first defender on both sides of the goal progress forward to close down their respective attacker once the coach gives a command. 

Their focus should be on a fast-controlled approach.

The defenders should also be instructed to position their bodies between the ball and the middle of the goal.

All of this is needed to help the players work on the speed of the approach, body posture, and positioning. 

4-5 times of this drill should be enough for each of the players or you can also make them continue trying it out until they are comfortable with approaching the attacker.


Coaching Tips

Ensure that the body positioning of the defenders is between the goal and the ball. This drill is aimed at helping close down space quickly at a fast-controlled approach. 


Defensive Speed Course

null

Objective

This fitness training-related drill is centered around improving defensive speed and quickness in front of the goal. 


Set-Up

Make sure the defensive players are lined up at the right corner of the 18-yard box and set up six to eight 6ft training hurdles with 2-yards equidistant apart from each other. The next thing to do is to mark off 5-yards and place a training stick there. Having done that, mark off another 5 yards from the last training stick and set a second training stick at a 45-degree angle away from the goal. Finally, put the last training stick about 5 yards directly towards the sideline from the last.


Execution

The responsibility of the coach is to tell the players to quickly double step over each training hurdle and ensure that each of their feet is placed in between each hurdle.

The players are to sprint to the first training stick as soon as they have exited the last training hurdle. 

Around the first training stick, every player must follow a quick 45-degree cut and move towards the second training stick. Note that this should also be repeated when heading towards the last training stick too.

Upon reaching the third (last training stick), the players are to make a 

90 degree cut and sprint towards the top of the 6-yard box.


Coaching Tips

This drill enhances fast feet, sharp turns, and also tests defensive players’ speed and quickness. 


1v1 Defending the Dribble

null

Objective

1v1 defending the dribble is designed to help isolate the defender to concentrate on the first defender and defending the dribble


Set-Up

You are to create a 10X10 grid with a cone put at each side of the grid 10yards apart and use pinnies (yellow/red) to separate the two teams equally into two groups (two players in each group). Facing the middle square, ensure each of the teams is line-up on the cones opposite one another. In addition, put a defender inside the middle grid. A player starts as the defender and another team is made the attacking team depending on how you choose your pinnies. 


Execution

The attacking team aimed at dribbling at the defender and also dribbling through the other side of the grid by beating the middle defender.

The player plays to the first player in the line he’s facing he has successfully made it through the grid and out the other side by dribbling. 

If the defender wins the ball from the next player, or the ball is knocked out of the grid, the player that loses the ball turns to be the new defender.

On the other hand, the player that won the ball or made the ball to be kicked out of the grid passes the ball to a teammate in line who now becomes the new attacker against the new defender in the middle in an attempt to get through to the other side and pass to the next player in line.


Coaching Tips

It is highly recommended that defenders should always concentrate more on important things such as bent knees with weight on the balls of the feet, chest leaning over the toes, staggered stance with toes at a 45-degree angle, ability to shuffle quickly, and other related key elements when defending 1v1's in soccer. 

As the saying goes... attack is the best form of defense. This is completely true, when you win the ball, if you can keep it away from your opponent then there is nothing for you to defend. Of course, when you have the ball you want to attack and create chances. In this clip, coach Leonard Griffin explains ways to build out from the back.

Tuesday, January 28, 2025

US Sports Track and Field: Two Points of Focus When Coaching and Training Hurdles


Difference in Focus between 100 Hurdles & 110 Hurdles

Two Points of Focus When Coaching and Training Hurdles

  • By Grant Young

Pinpointing and diagnosing mechanical issues in athletes can be particularly challenging for hurdle training due to several factors: 

1. Complexity of Technique: Hurdling requires a unique blend of speed, timing, and coordination, with the need to clear hurdles efficiently while maintaining forward motion. This complexity means that even small mechanical errors can have a cascading effect on an athlete's performance. Coaches must be adept at identifying these subtle errors, which can be tough given the fast-paced nature of the event. 

2. Variability Among Athletes: Each athlete presents a unique set of physical attributes, including height, stride length, and strength. These differences can influence hurdle technique, making it difficult for coaches to apply a one-size-fits-all approach. What may work for one athlete could lead to problems for another, complicating the identification of issues. 

3. Perceptual Challenges: Athletes often perceive their own performance differently than coaches observe it. An athlete may feel they are executing a technique correctly, while a coach may see noticeable flaws. This disconnect can lead to miscommunication, making it harder for coaches to accurately diagnose and correct mechanical issues. 

4. Subtlety of Errors: Many mechanical issues manifest in subtle ways that aren’t immediately obvious. For instance, slight misalignments in foot placement or body angles may not be detected without close observation or video analysis. Coaches need to be thorough in their assessments and often require advanced technology to catch these nuances. 

Because of these many factors, it’s important that coaches know what to look for when assessing mechanical mishaps their athletes may be dealing with during their hurdles. This is why we’ve pulled two points of focus when training hurdles from two elite hurdles coaches that you can keep an eye on next time you’re trying to decipher why your athletes aren’t setting their personal bests. 

Kenny Anderson - Training Focus

Kenny Anderson enters his fifth season as the Director of Track & Field/Cross Country at Central Methodist in 2024-25.

The 2022-23 season was a stellar year for Anderson and the Eagles, as 13 school records and one conference record were broken. The CMU Women won their second-straight Heart Indoor Conference Championship, which included five individual conference titles. As a result, Anderson was named both the Heart Conference and the USTFCCCA South Central Region Women’s Indoor Coach of the Year. Altogether, the Eagles garnered nine NAIA All-American selections, the most at a single national meet in program history.

In his ‘Difference in Focus between 100 Hurdles & 110 Hurdles’ clinic, Coach Anderson addresses a few points of emphasis when it comes to training your hurdle athletes.

One of his most crucial points in the clinic is that all training exercises and drills should be focused on producing the fastest time possible. Since that’s always the goal when competing, it should also always be the goal when competing. 

Going off of this, training and drills should emphasize the rhythm of hurdles. According to Coach Anderson, rhythm for a hurdler is the type of speed that allows hurdlers to use their techniques to the maximum. 

When emphasizing rhythm in drills, Coach Anderson likes to use seven, nine, or 12 hurdles, because he thinks that’s the sweet spot to establishing rhythm without doing too much to tire your athletes out. 

Patience is imperative when it comes to training hurdle athletes. If you’re executing perfect practice plans, utilizing drills that emphasize rhythm, and diagnosing all of your athlete’s mechanical flaws as soon as they occur, it would still be illogical to assume you’ll see tangible changes from your athletes’ times before six weeks. Coach Anderson says that usually, around six to seven weeks, he begins to see changes in his athletes’ times from the start of the season. 

Jamie West -  Common Technical Issue #1 - Take Off Spot

null

Jamie West has been a track and field coach for 15+ years. Coach West hurdled at Davis High School and went on to hurdle at D1 Weber State University. Coach West was a 2-time state champion in the 100m hurdles. 

Jamie West has enjoyed coaching hurdlers from all over the State of Utah as well as some hurdlers nationally and internationally. 

In her ‘Hurdle Drills, Technique, and Corrections’ clinic, Coach West discusses the most common technical issue she sees during the take-off phase and addresses how a coach can fix it.

To her, the most common technical issue at this phase is the athlete taking off too close to the hurdle. Some other common ones are if the hurdler isn’t aligned when they’re coming into their leap, with a third one being the athlete either not planting or dropping their hips when they enter the take off. 

When the athlete is jumping too close to the hurdle, the body will likely compensate by pulling backward, the body’s momentum will go upward, and the lead leg might have to be shifted somewhere off-center. All of these will slow the runner down considerably. 

Coach West also wants to make sure coaches are entering their take off on their heel, planting firmly, rather than on the ball of their foot. This is because all of that momentum that’s going into the ground with the heel is going to propel the athlete when they commence their take off.