Playoff Fever. Now Streaming On US Sports Radio!

- By Jackson Chlebowy
Ice Hockey is one of the most demanding sports in the world. It requires players to be explosive yet controlled, powerful yet mobile, and intensely focused while under pressure. Not only do you need to have all of these skills to be a good player, but you need to know how to utilize them at high intensity shift after shift.
While developing skating, shooting, and game senses will ultimately elevate your game, it's the off-ice training that gives players that extra edge over their competitors and allows them to reach their full playing potential. This is why it is crucial to start putting serious thought into how you train your body for the hockey season.
A thoughtfully designed strength and conditioning program tailored toward hockey-specific skills and muscle movements can make the difference between playing top-line minutes and riding the pine. Not only will a hockey workout program improve your performance, but it will also better prepare your body for competition and reduce injury risk.
________________________________________________________________________________________________________________________
Why Off-Ice Training Is Essential for Hockey Players
All of the core hockey skills, like skating, shooting, and battling for pucks require a mix of strength, endurance, and balance. Because hockey is uniquely played on ice, it's not just about being athletic, it's about applying your physical skills in a way that transfers to the ice.
A strong off-ice hockey training program should cover all of the following core groups:
- Explosive lower-body power for acceleration and strong strides
- Core strength and stability for balance, body control, and shot power
- Upper-body and grip strength for puck battles and physical play
- Conditioning that mimics game demands—Short, high-intensity bursts to mimic a 30-60 second shift.
- Mobility and recovery strategies to prevent injuries and enhance longevity
________________________________________________________________________________________________________________________
Components of Hockey Strength Training
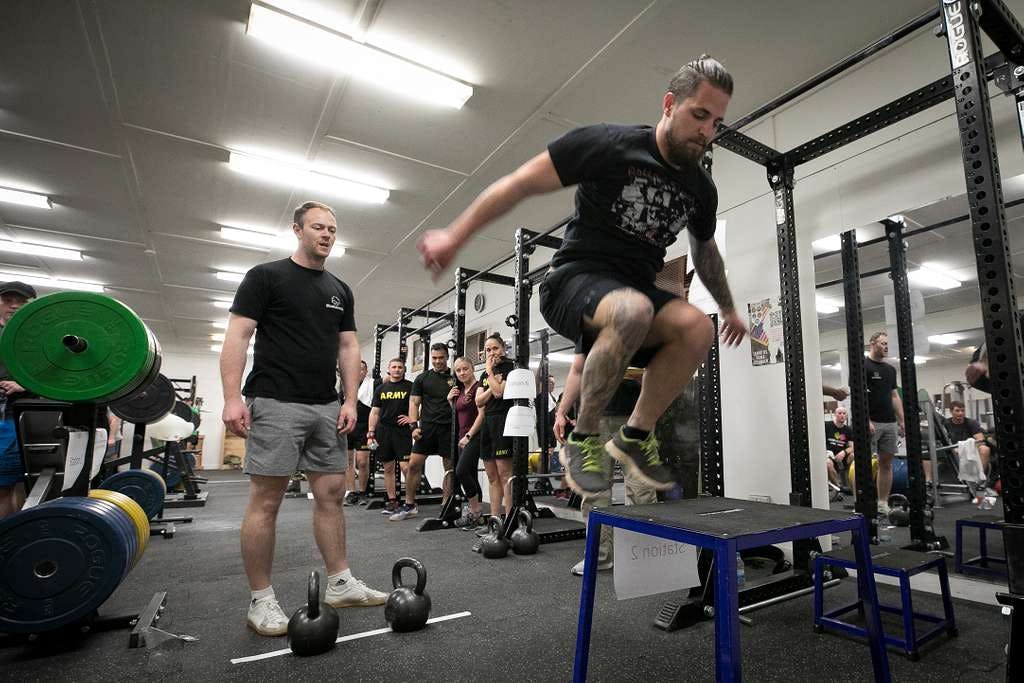
1. Lower Body Power and Skating Efficiency
Strong glutes, quads, and hamstrings are essential to producing a long and powerful stride. Compound lifts like squats and deadlifts are great ways to improve muscle strength. Combine traditional lifts with explosive movements like box jumps, short sprints, and lateral bounds to help build up explosiveness that translates directly to skating.
Recommended Lower Body Exercises
________________________________________________________________________________________________________________________
2. Core Training
No, we’re not training our core to look good for the ladies this offseason. Your core helps stabilize your spine during hits and battles to stay balanced and helps generate torque for your shot. The best training programs utilize anti-rotational, anti-extension, and dynamic core exercises like single-leg deadlifts, pallof press, and planks (and plank variations).
________________________________________________________________________________________________________________________
3. Upper Body Strength
Strong shoulders and good grip strength are crucial for those high-contact moments when you’re battling for pucks or fighting off a defender. Being able to bench 300 lbs is impractical for hockey, but being able to effectively push, pull, and stabilize yourself under pressure is essential. If you put effort into getting functionally stronger in these areas, you're bound to win more puck battles and be impossible to dispossess. Use compound and rotational lifts to replicate game movements in your training.
Recommended Upper Body Exercises
________________________________________________________________________________________________________________________
4. Energy System Conditioning
Hockey is an anaerobic sport. A normal hockey shift is between 30-60 seconds, so being able to exert maximum effort with minimal rest over the course of a game is essential. The best conditioning exercises mimic a short hockey shift — short sprints, and explosive efforts followed by a short recovery period.
Recommended Conditioning Exercises
________________________________________________________________________________________________________________________
5. Mobility, Injury Prevention, and Longevity
Injury prevention used to be an afterthought in most training programs; now it's one of the most focused-on aspects of training. Your body takes a lot of wear and tear over the course of the season. Your hips, groin, shoulders, and spine/back are constantly at risk of injury. That is why a good training program must include specific mobility and flexibility work. Training in flexibility will not only make you a better athlete, but it will also reduce your risk of injury (especially after putting on all that muscle with your new training plan). Fewer injuries mean you’ll be able to play the game we all love that much longer.
Recommended Mobility Exercises
________________________________________________________________________________________________________________________
The Evolving Landscape of Hockey Performance
What’s exciting about hockey strength and conditioning today is how collaborative and science-driven it has become. College and pro-level performance coaches are spilling their industry secrets and strategies for player development and injury prevention.
Events like the Strength on Ice Summit have become go-to resources for coaches, players, and trainers alike, offering insights into how the best of the best across the NCAA, NHL, and private sector are developing elite athletes. Topics range from contact preparation to goalie-specific durability work, and from gym-to-ice transfer methods to hip function in skating mechanics.
________________________________________________________________________________________________________________________
Final Thoughts
Building a strong hockey player is more than lifting heavy weights and running fast sprints, it's about intentionally training your hockey muscles for movement-specific functions that occur naturally on the ice. The best hockey players make themselves durable, explosive, and consistent through intentional training and thoughtful practice planning.
Strength and conditioning best practices continue to evolve every day, so you must stay up to date on the latest from experts in the field. Whether you’re training in a pro facility, a high school weight room, or your at-home gym, your approach should reflect the demands of the game.

Want to help kids find sports they love? Sign up to be a
 coach or volunteer in a local youth sports program. Learn more ways to
support youth sports in the National Youth Sports Strategy: https://bit.ly/2lIHPUc